
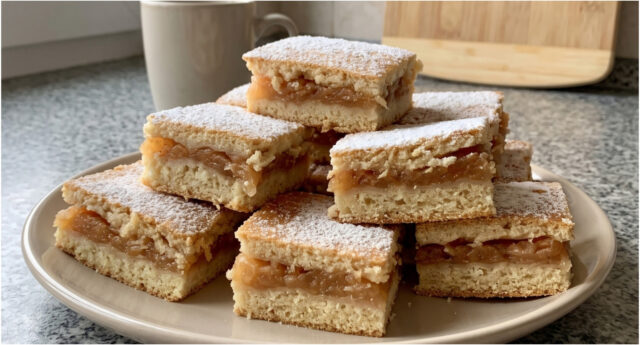
Delicate dough with a hint of lemon, a generous layer of grated apples, cinnamon, and vanilla sugar create simple slices that stay pleasantly moist. You can also add raisins to the filling if you like, and finish the baked dessert with a light dusting of powdered sugar.
Preparation is not complicated, as you only need to divide the dough into two parts and roll out equally sized sheets. The seasoned apples are layered between them, the edges are sealed firmly, and everything is baked on a single baking tray. You can peel the apples, but if you don’t mind the skin, you can simply skip this step.
What You’ll Need
For the dough:
- 250 g plain flour,
- 250 g semi-coarse flour,
- 120 g fat – such as butter or Hera,
- 120 g sugar,
- 2 whole eggs,
- 8 tablespoons milk,
- 1 packet baking powder,
- a pinch of salt,
- lemon zest,
- juice of half a lemon.
For the apple filling:
- apples,
- sugar to taste,
- ground cinnamon to taste,
- vanilla sugar to taste,
- raisins, optional.
For finishing:
- powdered sugar for a light dusting.
The original recipe does not specify the exact amount of apples, flavorings, or powdered sugar, so adjust them to the size of your tray and your own taste.
Step-by-Step Preparation:
1. Preparing the apples: Wash the apples, remove the cores, and peel them if you wish. Then grate them so they can be spread evenly between the two layers of dough.
2. Flavoring the filling: Sweeten the grated apples according to their natural sweetness and your own taste. Add ground cinnamon and vanilla sugar, optionally raisins, and mix the filling thoroughly.
3. Preparing the dough: Combine the plain and semi-coarse flour with the baking powder, sugar, and a pinch of salt. Add the fat, whole eggs, milk, lemon zest, and the juice of half a lemon, and work everything into a cohesive dough.
4. Dividing and rolling out: Divide the finished dough into two halves. Roll each part into a sheet matching the size of your baking tray so that both the bottom and top layers will cover the filling well.
5. Layering the slices: Transfer the first sheet of dough onto a baking tray lined with parchment paper. Evenly spread the prepared apple filling over it, making sure it’s not concentrated only in the center.
6. Covering and sealing the edges: Cover the apples with the second sheet of dough. Press the edges of both sheets together all around to keep the filling safely inside during baking.
7. Baking: Place the prepared slices in an oven preheated to 180 °C and bake for about 30 minutes. Adjust the time according to the color of the surface, which will indicate when the dessert is done.
8. Cooling and finishing: Let the baked apple slices cool. Only then dust them lightly with powdered sugar and cut into individual portions.
To Peel or Not to Peel the Apples
Peeling the apples is optional in this recipe. If you want a smoother filling without bits of skin, peel the apples before grating. If you don’t mind the skin, you can leave it on and save time in preparation.
In both cases, it’s important to remove the cores and grate the apples so they can be spread in an even layer. Adjust the amount of sugar to their flavor, as some varieties are naturally sweeter and others more tart.
How to Properly Seal Both Layers of Dough
After covering the filling with the top sheet, focus especially on the edges. Carefully press them to the bottom dough all around the tray. This keeps the filling enclosed between the layers and makes the finished slices easier to portion after cooling.
How to Tell When the Slices Are Done
The basic baking time is about 30 minutes at 180 °C, but the color of the dough is decisive. Watch the surface as it bakes and take the slices out when the color shows they’re done. Let them cool before dusting with powdered sugar, so the sugar doesn’t melt unnecessarily on the warm surface.