In today’s post we will show you Petra’s recipe and prepare a homemade Wallachian frgal with poppy seed, fudge or cottage cheese filling. Don’t hesitate and start preparing before it’s too late, every novice cook and chef can do it!
Recipe for homemade buns:
What we will need:
For 4 cakes we will need:
0,5kg of plain flour
85 g sugar powder
Pinch of salt
50ml oil
125g softened butter
2 egg yolks
Sourdough starter of 250ml milk and 42g yeast ( one cube) and a pinch of sugar
Lemon zest
How we will proceed:
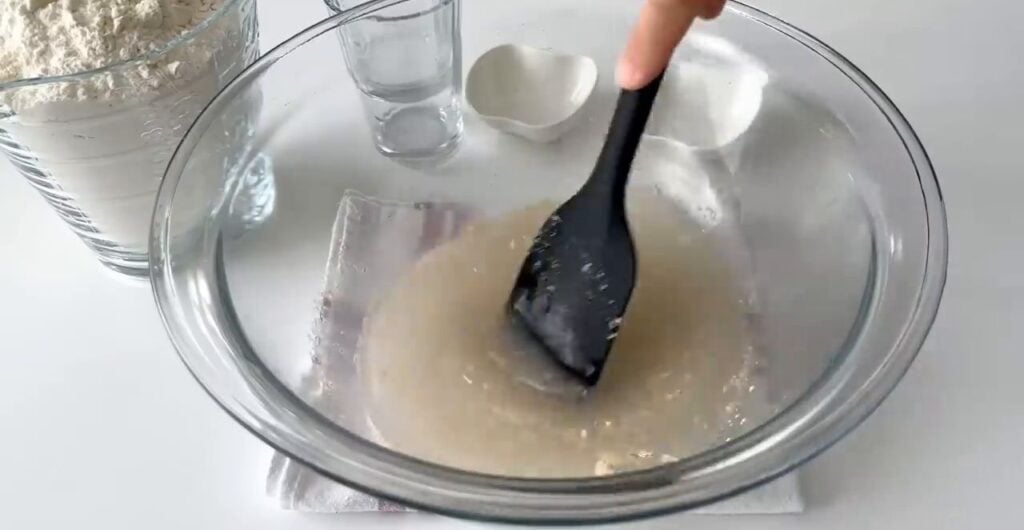
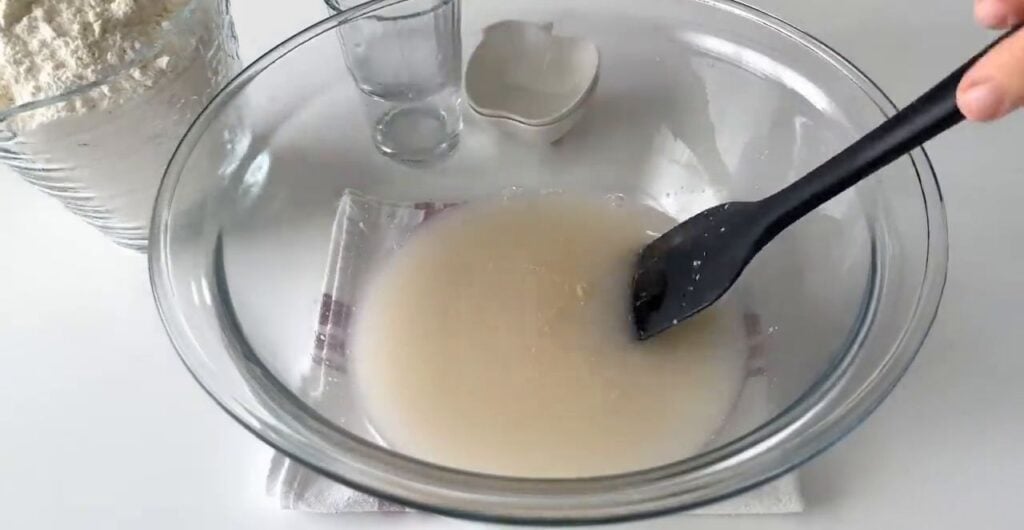
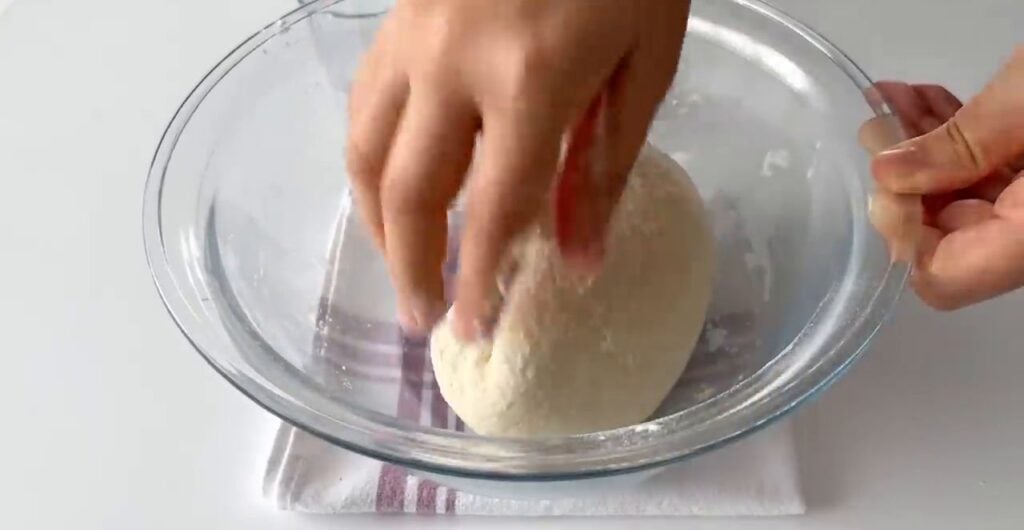
1. Leave the sourdough starter to rise and add to the other ingredients. Knead the dough by hand or with a food processor and let it rise.
2. Divide the dough into 4 parts and use your hands to form a circle about 30cm in diameter.
3. Put the fillings you like. I used poppy seed, cottage cheese, pear and fudge. Top with crumble. Brush the edges of the cake with egg and a little milk.
4. Bake in a preheated oven at 180° for about half an hour, but it depends on the oven…until the edges are brown.
Discover a new way to enrich your culinary routine with our recipe for excellent baked pork slices. This simple yet impressive recipe will become a hit among your family and friends due to its rich flavor and attractive appearance. Prepare this delicious dish and delight your loved ones with a new gourmet experience!
Source: schnell lecker
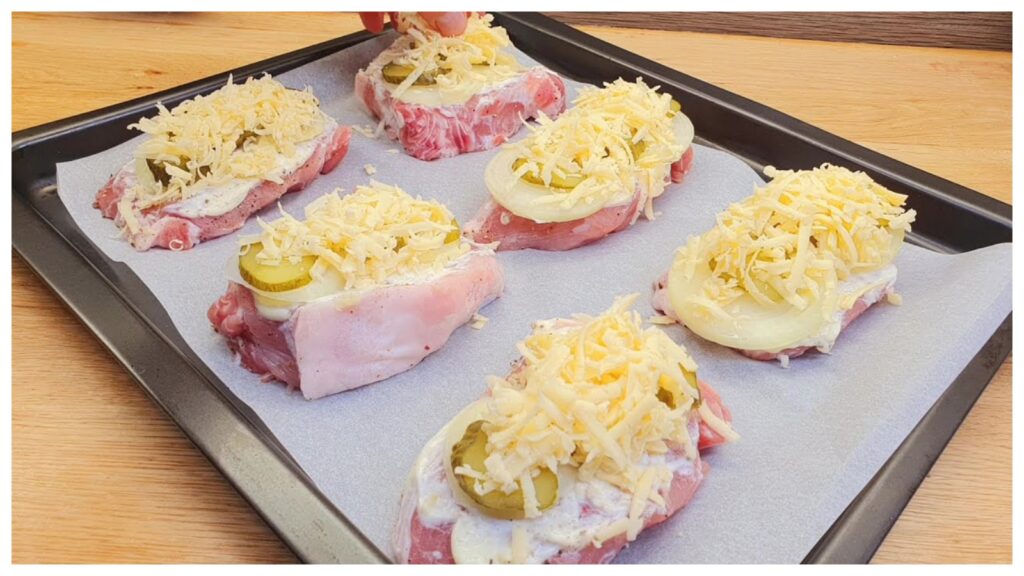
Delicious coated pork slices baked in the oven
What we will need:
6 slices of pork roast
Salt
Ground black pepper to taste
Mayonnaise
2 pickles
1 onion
100 g of hard cheese
How we will proceed:
1. Score a grid on both sides of each slice.
2. Season the slices with salt and pepper on both sides.
3. Spread mayonnaise on each slice.
4. Slice the pickles and onion into thin slices.
5. Place two rings of onion and three pieces of pickle on each slice of meat.
6. Grate the hard cheese on a coarse grater and layer it over each dressed cutlet.
7. Bake in a preheated oven at 180 °C (356 °F) for about 30 minutes.
8. After baking, the dish can be sprinkled with chopped parsley.
Conclusion
This recipe for excellent baked pork slices not only brings amazing taste but also aesthetic pleasure from the beautiful presentation of the food. It is an ideal choice for a family lunch or dinner when you want to offer something special. With a combination of a crispy surface, juicy meat, and a rich base of mayonnaise, pickles, and onions, this recipe is a sure way to enliven any table.
Today we have prepared a convenient article full of great inspiration on how to fine-tune not only the interior but also the front door. A simple wicker circle for just a few crowns is a great way to get creative and create beautiful spring wreaths!
This is a natural decoration that will brighten up any room you can playfully decorate! Whether you complement this decorative element with artificial or fresh flowers, Easter bunnies or colourful ribbons, you’ll have the atmosphere of spring in no time! You will be surprised yourself how easy and efficient it is to make this beautiful home accessory!
Today we have prepared a recipe for a delicious dessert with a tasty cream and walnuts. It tastes really delicious and we can’t wait to make it again. Prepare this delicacy and you will see that you and the whole family will enjoy it!
A delicious dessert with tasty cream and walnuts:
What we will need:
For the dough:
300 g plain flour
butter – 180 g
sugar – 100 g
baking powder – 9 g
egg yolks – 3 pcs
For the cream:
milk/full fat – 300 ml
butter – 120 g
sugar – 100 g
starch – 30 g
egg yolk – 1 pk
vanilla essence – 1 teaspoon
Next:
walnuts – 150 g
sugar – 80 g
egg whites – 4 pcs
How we will proceed:
1. Put the starch, icing sugar and one egg yolk in a saucepan. Whisking constantly, add 100 ml of milk and put the pot on the stove. Heat the mixture over low heat, stirring constantly, and add the remaining milk. Stir until smooth and once the mixture starts to boil, continue stirring for another 2 to 3 minutes until it thickens.
2. Remove from the heat, add the vanilla essence, stir and cover the surface of the cream with cling film so that it is directly on the surface (this will prevent scabs forming). Uncover the cooled cream, add the softened butter and beat both until smooth.
3. For the pastry, mix the plain flour with the caster sugar and baking powder and add the egg yolks and softened butter. Make a homogeneous and soft dough, wrap it in cling film and put it in the fridge for 15 minutes. Coarsely chop the nut kernels. Whip the egg whites into a stiff snow and add 80 g of sugar. The foam will be white, stiff and glossy.
4. Divide the dough into three equal parts, return two of them to the fridge and roll out the third on floured baking paper into a 20 x 30 cm rectangle. Align the edges and transfer the dough to the baking tray, spread a third of the egg white mousse on top and sprinkle with a third of the chopped nuts.
5. Place the dough in an oven preheated to 175 °C and bake for 15 minutes.
6. Do the same with the remaining two parts of the dough, the egg white mixture and the nuts.
7. Assemble the dessert by piling the pastry on a tray and alternating layers of cream on top.
8. The last layer should be a sheet of pastry with nuts on top. Refrigerate the dessert for 4 to 5 hours.
Everyone knows the feeling of biting into a fresh citrus. It is a very acidic fruit, but it gives us lots of vitamin C, which is important for our health. We usually mix their juice in drinks or add it to sauces or salads. However, we could also find a use for them in the decoration area, as this fruit adds a unique touch to any table and shelf. That’s why in today’s article we have prepared a lot of beautiful inspirations on how to use citrus and other fruits (apples) for glass vases.
All you need to do is to prepare an empty container, fill it with fruit and pour water over it. If you want to play with the citrus more, you can slice the fruit and then arrange it on the sides of the jar so that you can fit an even smaller glass container in the middle. You then pour water into this jar and add your spring flower.
Source: Pinterest
The color and shape of the citrus fruit is really pretty, which is why this decoration is worth trying. So get inspired by these home decoration ideas with fruits that will instantly create a spring atmosphere in your home!
If you liked the article on spring inspiration for glass vases that can be filled with citrus in addition to flowers, don’t forget to share it with your friends who will love it too.
Today, we have prepared a recipe for a delicious cake with a delicious vanilla cream that will surpass even the cakes from the pastry shop in taste. We are talking about the fabulous Aniko cake with vanilla cream that melts on the tongue. Prepare this delicacy and you will see that you will not regret it! It tastes really fabulous!
Source: kiloretete.ro
Delicious cake with delicious vanilla cream:
What we will need:
For the batter:
250 g plain flour
sugar – 170 g
oil – 100 ml
water – 100 ml
eggs – 5 pcs
baking powder – 1 bag
cocoa – 2 tablespoons
For the cream:
milk – 800 ml
sugar – 140 g
vanilla pudding – 2 sachets
For decoration:
whipping cream – 300 ml
sugar – 250 g
ground cinnamon
How we will proceed:
1. Line a baking tray or baking dish with baking paper and preheat the oven to 170 °C.
2. Sift the flour and baking powder through a fine sieve into a bowl and mix the two ingredients together. In another bowl, combine the beaten eggs with the sugar and beat with a whisk until the sugar is completely dissolved and the eggs have turned into a thick, whitish and frothy mass. Add a hundred millilitres of water and the same amount of vegetable oil to the egg mixture, mix and then stir in the sifted flour and baking powder a little at a time.
3. Once you have a homogeneous batter, pour about a little more than half of the batter into the prepared tin or baking dish. Then mix the remaining batter with the cocoa powder, stir thoroughly to form a dark brown mass, and alternately pour this over the white batter in the tin.
4. Pour two-thirds of the measured milk into a saucepan and bring it to the boil over a low heat. Mix the remaining milk with the custard powder and sugar and stir the mixture thoroughly so that no lumps remain. When the milk in the saucepan starts to bubble, add the whisked custard powder and sugar and cook the mixture, stirring constantly, until it thickens. Pour the custard over the cake in the tin and place it in the preheated oven to bake for about 25 to 30 minutes.
5. Let the finished cake cool completely. In the meantime, whip the cream with the icing sugar to a soft, stiff and fluffy foam and once the cake has cooled, spread it evenly over the surface of the cake and sprinkle with ground cinnamon.
Fill your home with a pleasant aroma and your taste buds with irresistible delights! Savory crispy snails made from yeast dough with a spinach-onion filling are not only delicious but also easy to prepare. Prepare yourself for a unique taste experience full of aroma and delicacy.
Savory Crispy Snails with Spinach-Onion Filling
What we will need:
Dough:
2 cups of water
5 g dried yeast
8 g salt
4.5-5 cups of flour
Other:
50 g melted butter
100 ml oil
1 egg/yolk – for brushing
Filling:
500 g spinach
2 onions
salt – to taste
black ground pepper – to taste
red ground paprika – to taste
black ground pepper – to taste
How we will proceed:
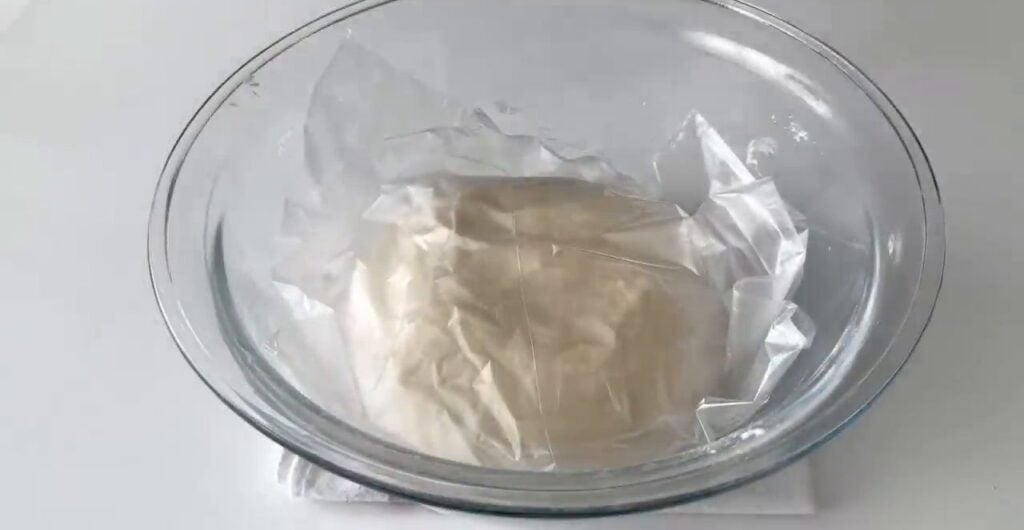
1. Dough: Pour water into a bowl and add dried yeast. Stir until the yeast dissolves, then add salt and gradually mix in the flour. Knead well, cover with plastic wrap and let rest for 10 minutes in a warm place.
Source: Zelihanın Tatlı tuzlu tarifleriSource: Zelihanın Tatlı tuzlu tarifleriSource: Zelihanın Tatlı tuzlu tarifleriSource: Zelihanın Tatlı tuzlu tarifleri
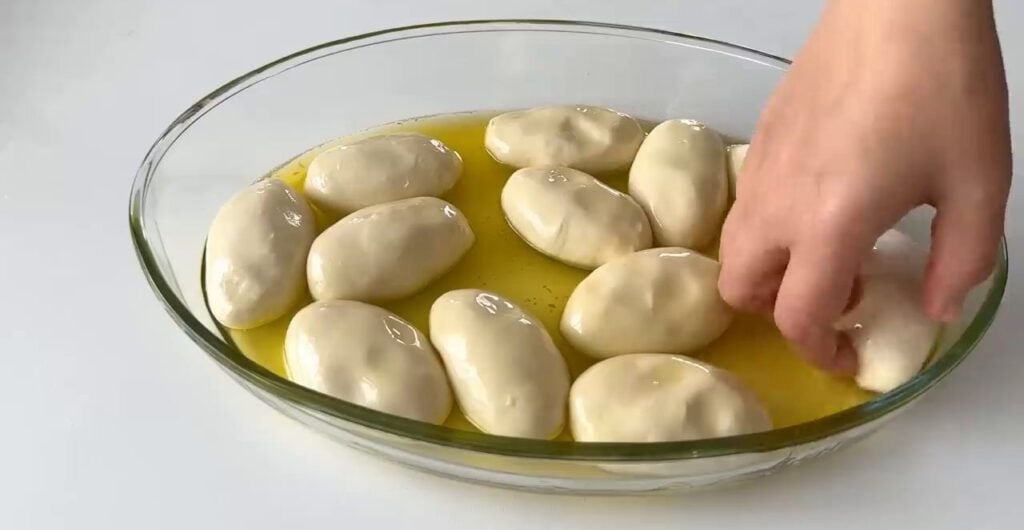
2. Subsequently, cut the dough into 12 equal parts, shaping each into a small roll.
Source: Zelihanın Tatlı tuzlu tarifleri
3. Pour melted butter and oil into a suitable large oval bowl, then roll each piece in the melted butter and oil, cover with plastic wrap, and let rest for 30 minutes.
Source: Zelihanın Tatlı tuzlu tarifleriSource: Zelihanın Tatlı tuzlu tarifleri
4. Filling: In a pan with heated oil, add roughly chopped onions and fry over medium heat until golden. Season with salt, red ground paprika, and black ground pepper – stir and continue frying for a short while.
5. After frying, transfer it to a large bowl with fresh spinach – mix well.
Source: Zelihanın Tatlı tuzlu tarifleri
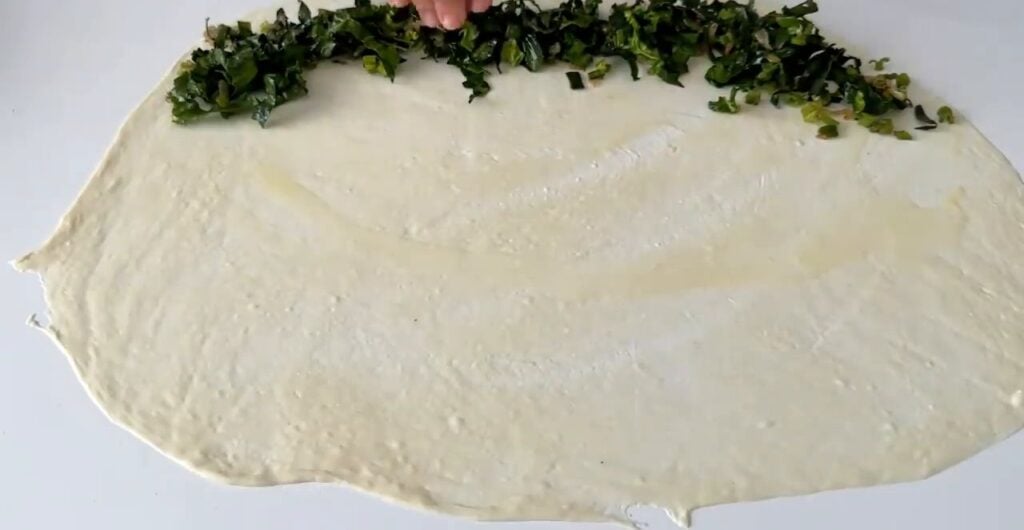
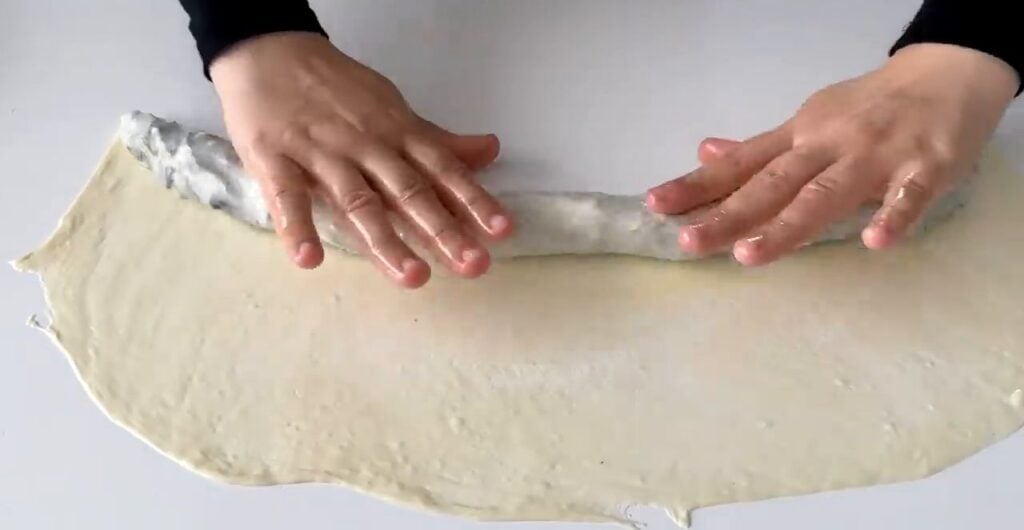
6. After 30 minutes, stretch the dough and lightly brush with melted butter, then apply the spinach filling with onions at one end and gently roll into the shape of a snail. Repeat this process with each roll.
Source: Zelihanın Tatlı tuzlu tarifleriSource: Zelihanın Tatlı tuzlu tarifleri
7. Then place them on a parchment-lined baking sheet and brush with beaten egg or yolk to make them beautifully golden.
Source: Zelihanın Tatlı tuzlu tarifleri
8. Bake in a preheated oven at 200 °C until golden brown and crispy as needed.
9. After baking, serve with love, great taste, and joy.
Source: Zelihanın Tatlı tuzlu tarifleriSource: Zelihanın Tatlı tuzlu tarifleri
Today we have prepared a recipe for a delicious delicacy that we prepare very often. Everyone will love this grandmother’s delicate creamy cake. The taste is really delicious and we guarantee you that one tin will definitely not be enough. With a cup of great coffee and you’ll feel like you’re on a cloud.
Source: suntgospodina.net
Recipe for grandma’s soft creamy cake:
What we will need:
400 grams of semi-coarse flour
1 egg
250 grams softened butter
100 grams of icing or granulated sugar
2 teaspoons cocoa powder
1 tablespoon sour cream
1 teaspoon baking powder
For the cream:
2 packets of vanilla custard powder
500 ml milk
200 grams of icing sugar
1 teaspoon vanilla sugar,
500 ml whipping cream
1 tablespoon cocoa powder
Next:
400 ml cooking cream
butter biscuits
milk chocolate
How we will proceed:
1. Sift the semi-coarse flour and baking powder into a bowl, add the softened butter, eggs, cocoa powder, sour cream and sugar. Mix the ingredients thoroughly to combine, making a smooth and semi-fluid batter.
2. Take a baking tray and line it with baking paper. Pour the prepared dough for the crust onto the baking sheet (about 31 x 23 cm) and place in the oven to bake for about 20 to 25 minutes at 180 degrees Celsius. While the crust is baking, you can start preparing the filling.
3. Pour the milk into a saucepan, add the sugar and custard powder and bring to the boil. When the mixture starts to bubble, remove the pudding from the heat and let it cool. Stir the whipping cream and vanilla sugar into the cold custard. Then divide the resulting mixture into two equal parts. Season the other with cocoa.
4. Once the cake has cooled, spread the vanilla cream evenly over the entire surface of the cake. Then layer the butter cookies on top of the cream. Spread all the cocoa cream on top.
5. Finally, whip half a pint of cream into a stiff cream and spread it over the entire surface of the cake.
6. Top the whipped cream with white chocolate and you’re done. Ideally, chill the dessert in the fridge for a few hours.
Today’s article belongs to passionate gardeners who are making new improvements to their garden. We’ll show you how you can effectively solve the lawn or walkway divide. An inexpensive lawn separator is the perfect solution for this and will guarantee harmony in the garden.
This garden helper should not hinder the care of the plants or the maintenance of the lawn itself! And for this reason, we think it is an essential element for any garden that is rich in ornamental rockeries, flowerbeds or walkways. Take a look at the gallery below, which is full of beautiful inspiration, and get creative.
A terrace is defined as an outdoor part of a building designed mostly for practical and architectural purposes! However, as soon as someone says terrace, we immediately associate it with weekend comfort, relaxation and pleasant rest. And since we are approaching the spring season, with which the work in the garden starts, we decided to gather some cool inspirations for you!
This is a great way to make the exterior of your home a more relaxing place to be. Whether you have a large space or a smaller one, it would be a shame not to make use of such a place in the fresh air. Besides, patios create a unique relief and are a suitable addition to any style of house and garden.
So, if you’re looking to do a makeover around your house this year but need a little inspiration, we’re here for you! These wooden patios are a charming outdoor seating area that took our breath away with their originality and beauty!
Prepare this crumb cake with custard. Whether you enjoy your coffee alone or invite friends over, everyone will appreciate the sweet spot in the form of this tasty dessert. Don’t wait for anything and get started before it’s too late, every novice cook and chef can do it! Thanks to Martina for the recipe.
Recipe for crumb cake with custard:
What we will need:
Crumble:
3,5 cups semi-coarse flour
1 cup sugar
1 cube of butter
egg – 1 piece
1 vanilla sugar
1 baking powder or 2 teaspoons baking soda
Filling:
2.5 sachets of custard powder
1 l milk
3,5 tablespoons sugar
fruit, even frozen
How we will proceed:
1. Process all the ingredients into a crumble.
2. Make the pudding from the filling ingredients and pour it on the baking sheet with the crumble while still hot. Cover with fruit and sprinkle with the rest of the crumble.
3. Place in a preheated oven at about 180°C. I baked for about 40 min.
4. Let cool.
Good taste!
TIP: It depends on what fruit you use. I used a frozen mixed berry, so I sprinkled a little more sugar on top – I tried a rum flavoured cane sugar. It’s a very quick pie … and just as good. I made a half batch.
The wicker fence is ideal for natural and country gardens, but can also be used elsewhere. You can also use the wicker to create a beautiful screen for your patio or outdoor seating. A classic wicker fence is not very interesting and does not impress anyone. A wicker fence as well as garden screens made of wicker can not only provide privacy, but are also sufficient protection against wind, noise and sun.
For the production of wicker fences and garden screens, two types of unpeeled wicker are usually used, which can be combined with each other. These are willow wicker and hazel wicker. Take a look at the gallery below and improve your garden.
Looking for some tasty treats for your afternoon coffee? We have a simple inspiration for you. Today we’re going to make a fantastic cream cake together with a BeBe biscuit base! Thanks to the attached photo recipe and video instructions, preparing this treat is very easy and time-saving.
Are you starting to salivate already? So put on your chef’s hat, grab your cooker and let’s make this fantastic cream cake with BeBe biscuit base together!
Mini pizzas in the oven represent the perfect quick dinner or snack that you can prepare with what you find in the fridge. This recipe combines spicy spread, your favorite cold cuts, vegetables, and cheese, all complemented with a bit of ketchup and herbs for extra flavor. The simplicity and flexibility of this dish will delight you, and the baked toasts will become your favorite quick dish.
Mini pizzas
What we will need:
Sliced bread
Spicy spread (you can use any according to taste)
Cold cuts of your choice (ham, salami, etc.)
Vegetables (e.g., tomatoes, peppers, onions)
Cheese slices (cheddar, gouda, mozzarella, etc.)
A bit of ketchup
Oregano or herbes de Provence
How we will proceed:
1. Preheat the oven to 200 °C (392 °F).
2. Spread the sliced bread with the spicy spread.
3. Arrange slices of cold cuts and vegetables on top of the spread according to taste.
4. Place cheese slices on top of the toasts, which will melt beautifully in the oven and bind all the ingredients together.
5. Lightly drizzle with ketchup and sprinkle with oregano or herbes de Provence for extra aroma.
6. Place the prepared toasts in the preheated oven and bake for about 15 minutes until the cheese turns golden brown and the toasts are crispy.
7. Let the baked toasts rest for a while after baking, then serve warm.
Conclusion
Mini pizzas in the oven are a great choice for anyone looking for a quick but tasty meal. Thanks to the rich combination of ingredients and the possibility of endless variations, they never disappoint. Enjoy this versatile recipe with your favorite ingredients and treat yourself to a delicious dish that will satisfy and please.
Looking for an original idea for your garden furniture? If you’re reading this article, it’s a safe bet that you’ve thought of the wooden pallet, which is very trendy in the world of decoration and home furnishings. After that, you just need to add cushions to the pallet for a touch of comfort.
For a small garden, a small balcony or even a patio, a wooden pallet is ideal. You can choose to make complete garden furniture or just some elements such as just a bench, corner sofa, table or coffee table. It’s a great way to make your own cheap garden furniture.
Source: pinterest.com
Why is a palette ideal for garden furniture?
Easy to make:
You don’t have to be a DIY pro to start making your own pallet garden furniture! To get started, for example, you can simply stack a few pallets on a table to create benches. Then you just need to add a few cushions to make the seating more comfortable.
Customizable:
It is very easy to ” customize ” your garden furniture with pallets. Do you want a specific seat height? Just stack the pallets! Want a longer bench? Add pallets!
Durable:
Originally designed for transporting and storing goods, a pallet is a strong and durable object.
Suitable for outdoor use:
The wooden pallet is suitable for outdoor use. In fact, they are often pre-treated.
Modular:
A great advantage of making your own garden furniture is the ability to create unique furniture perfectly suited to your desires and the constraints of your garden. ” Classic ” sofas can also be combined with pallet furniture.
GALLERY:
Source: pinterest.com
The palettes retain their ” raw ” look and the pillows bring a pop of color.
Source: Pinterest.com
A pretty pallet garden lounge with a sofa and a coffee table on wheels that can fit a parasol. Indispensable for using this space during long summer days.
Source: pinterest.com
A great example of elegant all-white garden furniture consisting of a pallet coffee table
and a corner sofa. This garden furniture is placed on a wooden patio. Many cushions are added for comfort.
Above is an idea for a pallet garden room composed of high-backed chairs and a sofa. Note also the simplicity of the table, made from 3 stacked pallets, nothing too complicated to do yourself!
A great recipe for sour cheesecakes that our grandmothers used to make! This recipe always takes me back to my childhood. They are delicious and last a very long time soft, but despite that they always disappear from the table in no time! They are great for breakfast, but also as a snack for the kids. Let’s do it!
Source: artplanet.cn
Sour cheesecakes
What we will need:
700 g plain flour
2 dcl lukewarm milk or whey
fresh yeast 1 tablespoon
100 g sugar
80 g butter
pinch of salt
strawberry jam
250 g cottage cheese
1 vanillin sugar
3 tablespoons icing sugar
raisins
2 egg yolks
How we will proceed:
1. Dissolve the yeast in the milk and leave to rise with the other ingredients.
2. I add the sourdough starter to the flour, add salt, butter and knead into a smooth dough. I leave it to rise.
3. I then gently roll out the dough and cut out rounds with a 2dcl glass.
4. I place them on a greased baking tray, where I gently press the dough in the middle with my fingers.
5. I add the cottage cheese and put a small teaspoon of strawberry jam on top of the cottage cheese. We can decorate with sunflower seeds, for example.
6. I let it rise on the baking sheet for another 10 minutes.
7. Brush with oil and bake in a preheated oven at 200 °C for about 30 min.
8. After baking, drizzle with water and cover with a tea towel – the cookies are softer then. Done!
Good taste!
If you are interested in this recipe for sour cheesecakes, share it with your friends!
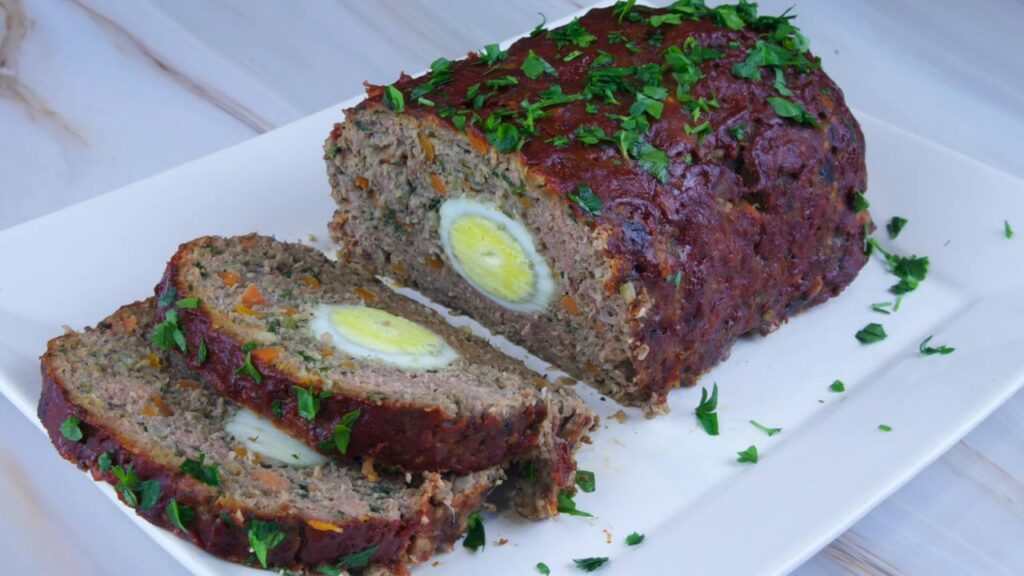
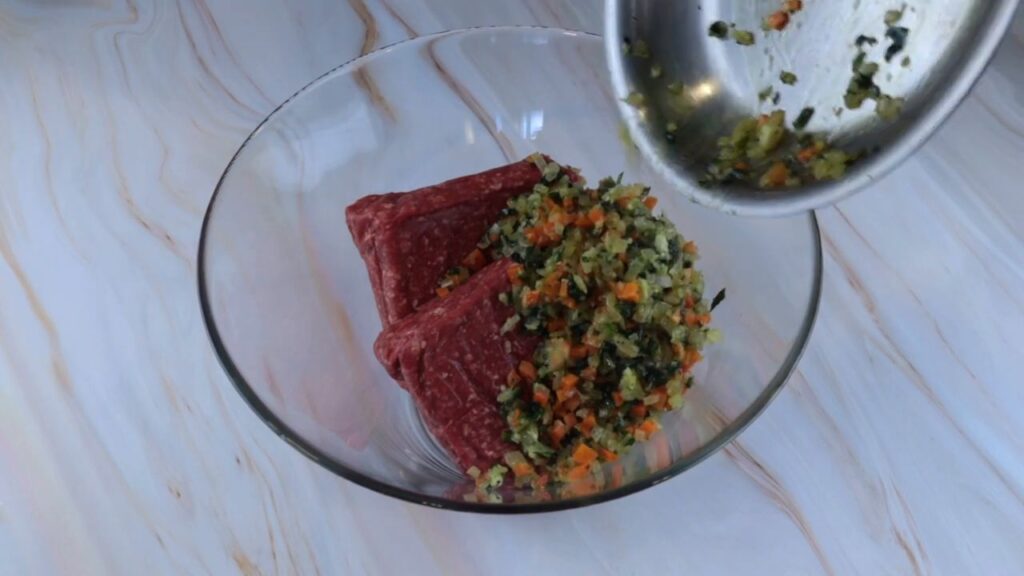
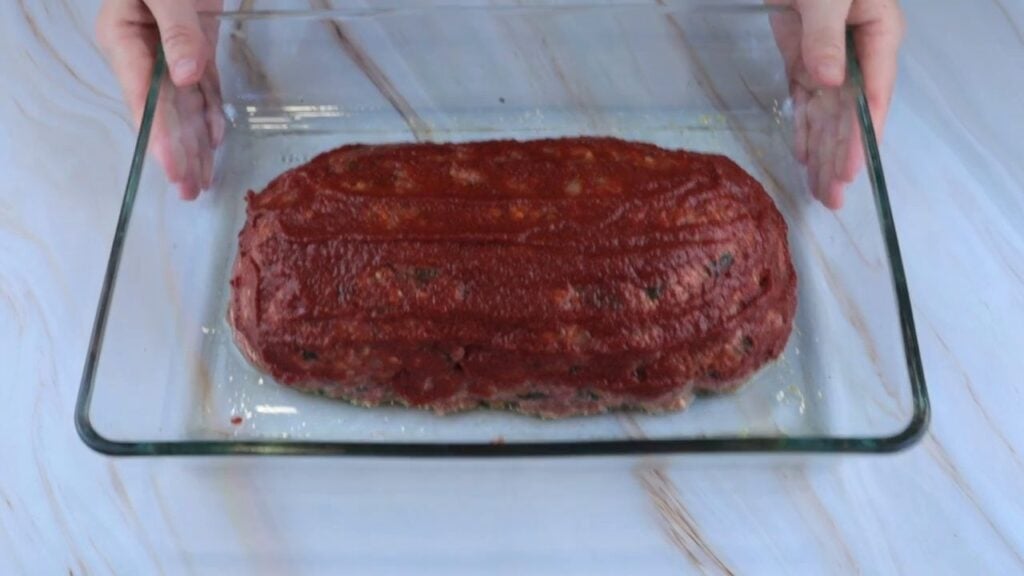
Imagine a simple yet tasty roll that can be prepared in no time and will surely delight the whole family. Baked roll with minced beef and vegetable filling with eggs is a great choice. Get ready for a simple yet delicious dinner that will surely please you!
Source: Dishes of Delicious
Baked roll with minced beef and vegetable filling with eggs
What we will need:
Minced beef mixture:
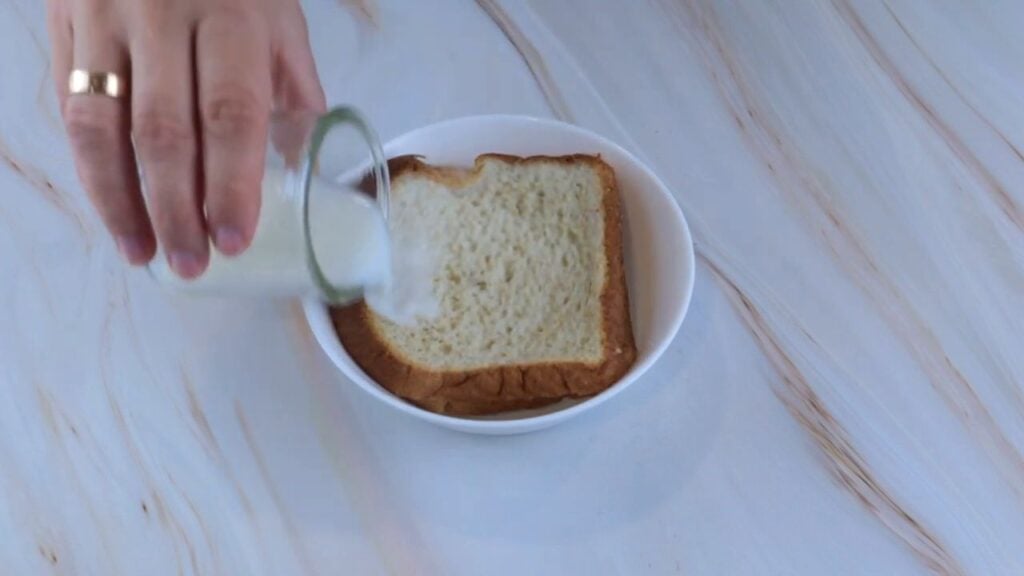
2 slices of bread + 1/4 cup of milk
olive/vegetable oil – for frying
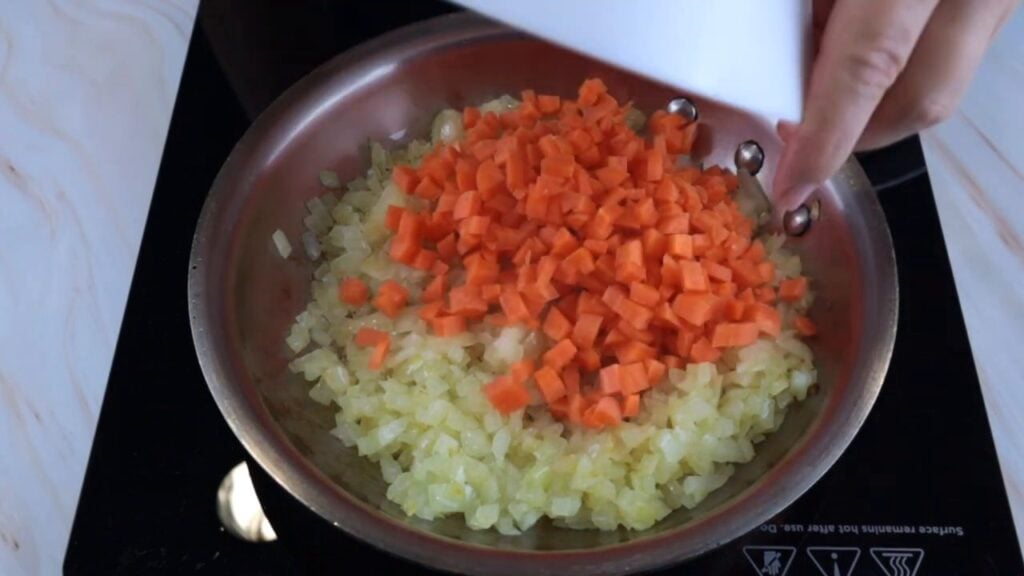
1 onion
1 carrot
4 cloves of garlic
1/2 cup frozen spinach
salt – to taste
black ground pepper – to taste
2 kg minced beef
1/2 cup oats
1 egg
1 tablespoon dried marjoram
Other:
oil – for greasing the baking dish
some breadcrumbs – for dusting the baking dish
1/4 cup BBQ sauce – for brushing
Filling:
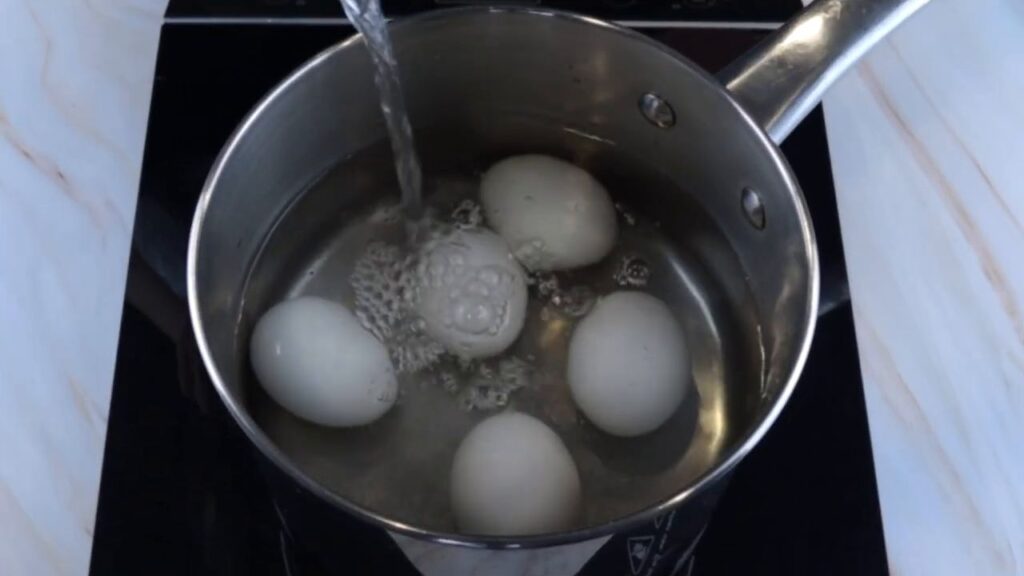
4 hard-boiled eggs
For garnish and sprinkling:
freshly chopped parsley
How we will proceed:
1. First, boil the eggs hard and place bread slices on a plate, then pour milk over them – let them soak.
Source: Dishes of DeliciousSource: Dishes of Delicious
2. Minced beef mixture: In a pan with heated oil, add finely chopped onion, stir, and fry until golden brown over low heat. Then add finely chopped carrot – mix and fry together until soft.
Source: Dishes of Delicious
3. Then add pressed garlic and frozen spinach to the pan, season with salt and black ground pepper – mix well.
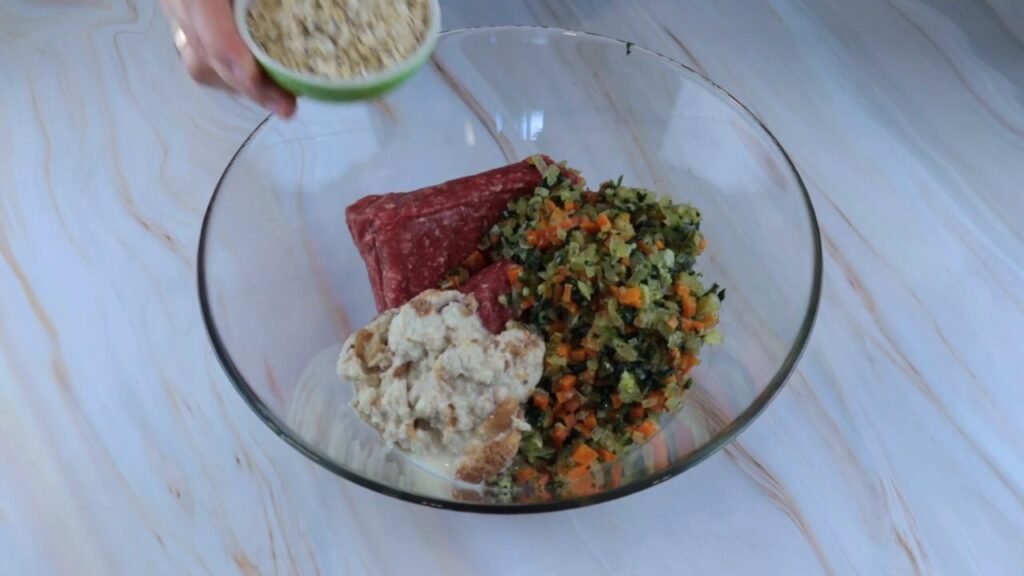
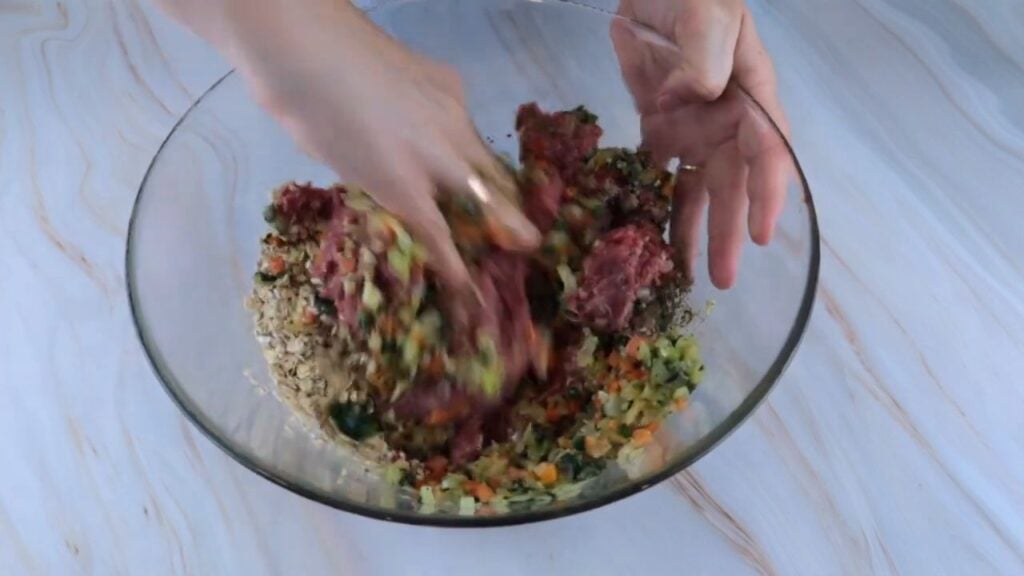
4. Transfer the cooked mixture to a bowl with minced beef, add soaked bread in milk, oats, beaten egg, and season with dried marjoram – mix thoroughly by hand.
Source: Dishes of DeliciousSource: Dishes of DeliciousSource: Dishes of Delicious
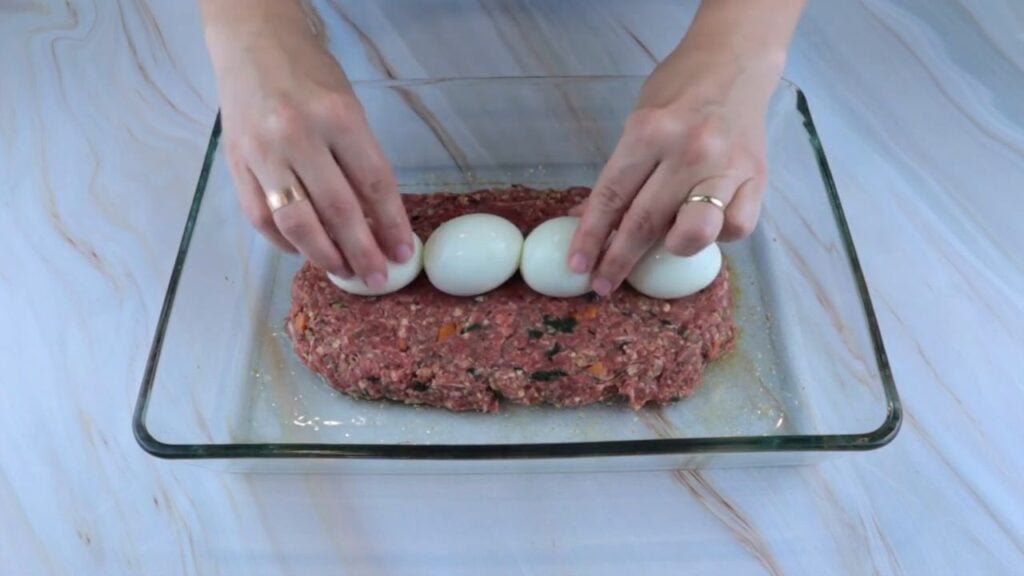
5. Then spread half of the meat mixture into the center of a greased and breadcrumb-dusted baking dish. Then place the hard-boiled eggs neatly in a row in the center of the mixture and cover with the second half of the meat mixture – shape the roll and brush it with BBQ sauce.
Source: Dishes of DeliciousSource: Dishes of DeliciousSource: Dishes of Delicious
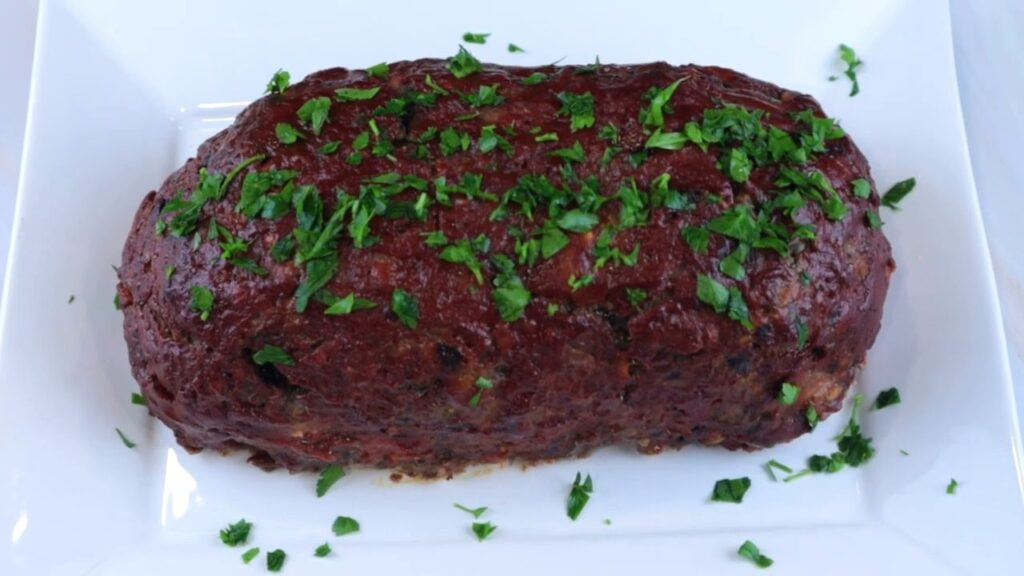
6. Bake in a preheated oven at 180°C as needed until golden brown and crispy.
7. After baking, garnish it with freshly chopped parsley and serve it with love and great appetite. You can also choose a side dish according to your preference or dressing that you like.
Spring is slowly but surely approaching. That’s why we’ve prepared a themed article full of great inspiration for beautiful decorations that will delight you throughout the spring months. We’ll show you how to use old dishes that have outlived their usefulness. Instead of throwing it away, you can consider reusing it! All that is required is a little creative imagination and DIY skill.
You can use old mugs, bowls, plates, jugs, baking pans, baking dishes and many other kitchen utensils to create some of the following decorations. Then go for a walk and collect nature’s gifts such as twigs, twigs, moss along the way. You can also use spring bulbs or your favourite flowers. In the last stage of creation, just add spring decorations.
You will be surprised yourself how easy it is to make this beautiful home decoration! Take inspiration from the photos below, where you can find some cool ideas from great creatives.
I’ve had this recipe on my radar for a long time and I don’t regret giving it a try. It can be made in several variations and I tried this coconut one. It’s a Turkish dessert for the Sultan which is really popular. Don’t wait for anything and rush into the preparations before it’s too late, every novice cook and chef can do it!
Source: peceni_se_suzi
Recipe for Sultana Roll:
What we will need:
For the dough:
1 cup of plain flour (200 ml)
1 litre of milk
vanilla
1 cup of icing sugar
vanilla sugar
50 g butter
For the wrapping:
Bag of coconut (you don’t need all of it, but you need a lot)
For the cream:
1x whipping cream
0.5 kg of strained yoghurt
sugar to taste
For garnish:
Dried fruit
How we will proceed:
1. Put the flour and sugar in a saucepan, stir, pour in the milk and make a thick pudding. Remove from the heat and add the butter and vanilla sugar, stir well to melt the butter.
2. Line a baking tray with baking paper, sprinkle with coconut, but lots of it, and pour this pudding over the coconut and leave to cool.
3. For the custard, whip the cream with the strained yoghurt and sugar.
4. Then put the cream on top of the cooled pudding and then cut strips on a baking sheet, like a roll, and roll them up, finishing with the coconut you have underneath. Decorate and serve. We wish you a good taste.
There is nothing better than bringing a piece of nature into your home. In today’s post, we’ll show you how to do just that with round wooden sheets that can be used to make magical spring decorations.
Forget the classic wreaths and artificial decorations from the shops. This wooden placemat is an original element that will stand out beautifully in the centre of your table! Just complement this rustic placemat with spring decorations and conjure up a magical spring atmosphere. See for yourself and get inspired in our photo gallery 🙂